June 30, 2022

Invite External Users to a SharePoint Site / Add External Users to a SharePoint Group via Power Automate

Introduction

In this blog, we will demonstrate how we can programmatically add external users to a SharePoint Group without using Azure Application and User.Invite.All permission with the help of Power Automate. 

Solution

Firstly, we will create a JSON object that will contain the data that we need to add a new external user to a SharePoint Group as shown in the below image. 

Replace the highlighted content in the object below:

 {   
  "url": "https://tenantname.sharepoint.com/sites/sitename",   
  "peoplePickerInput": "[{\"Key\":\"Email Address\",\"DisplayText\":\"Email Address\",\"IsResolved\":true,\"Description\":\"Email Address\",\"EntityType\":\"\",\"EntityData\":{\"SPUserID\":\"Email Address\",\"Email\":\"Email Address\",\"IsBlocked\":\"False\",\"PrincipalType\":\"UNVALIDATED_EMAIL_ADDRESS\",\"AccountName\":\"Email Address\",\"SIPAddress\":\"Email Address\",\"IsBlockedOnODB\":\"False\"},\"MultipleMatches\":[],\"ProviderName\":\"\",\"ProviderDisplayName\":\"\"}]",   
  "roleValue": "group:GroupID",   
  "sendEmail": true,   
  "emailBody": "",   
  "includeAnonymousLinkInEmail": false,   
  "useSimplifiedRoles": true   
 }   
Set the Email Address of the external user that you want to add to the SharePoint Group.  

Set the GroupID of the SharePoint Group to which you want to add the user. 


Now that we have created the JSON string with the required data, the next step will be to add this JSON to the Request Body and send the request as shown in the below image.


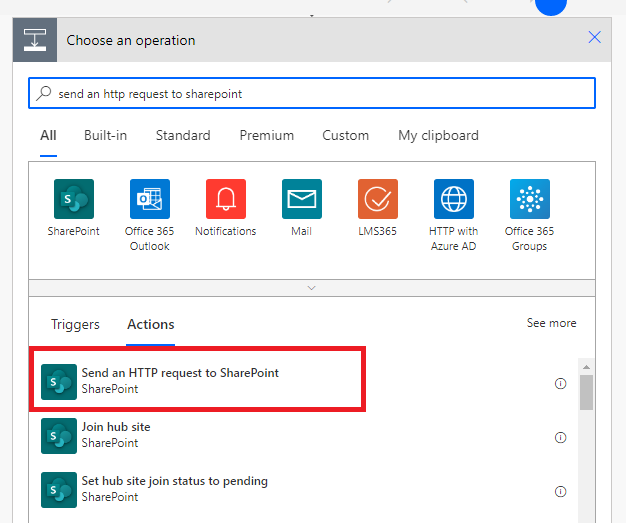
In the "Send an HTTP request to SharePoint" action fill the details as per below:
 Site Address: https://tenantname.sharepoint.com/sites/sitename   
 Method: Post   
 Uri: _api/SP.Web.ShareObject   
 Headers:    
 {   
  "accept": "application/json;odata=verbose",   
  "content-type": "application/json;odata=verbose"   
 }   
 Body: Output of Compose Action   
The flow can now be tested. Once the flow instance has succeeded the invite is sent to the external user. After the external user accepts the invite, the user should be automatically redirected to the SharePoint site with the appropriate access. 

Conclusion

By using this HTTP Post Request, we can invite an external user to any SharePoint Site without any need of the Azure App and any mandatory permissions such as User.Invite.All (which requires Admin Consent). Hope this helps!

If you have any questions you can reach out our SharePoint Consulting team here.

June 23, 2022

SharePoint Framework (SPFx) - How to add Request Header while using PnP for SharePoint List CRUD Operations?

Introduction:

In this blog we will learn how can we add the Request Header while using PnP in SharePoint Framework (SPFx) web parts.

Problem Statement:

When we use the Fetch or Ajax requests in SPFx, we have option to add the Request Header to the REST API requests we are using, but when using PnP, there is no option to add the Request Header while performing CRUD operations in SharePoint.

For example, while using Fetch Request to get the list items, we can add the header as give in below code snippet:
 return fetch(APIUrl, {  
    credentials: 'same-origin',  
    headers: {   
         'Accept': 'application/json;odata=verbose',  
         'odata-version': ''   
    }  
   })  
    .then((res) => res.json())  
    .then((result) => {      
     return result.d.results;  
    },  
     (error) => {  
      console.error('Error:', error);  
     }  
    );  

But, to get the list items using PnP, we will use below code and we will not have option to add the headers:
 await web.lists.getByTitle('List Title').items.select("Title").then((response) => {  
    this.setState({ SiteTimeZoneOnly: response[0].TimeZone });  
 });  

Resolution:

How to add headers:

Step 1) Go to the .ts file of your web part.

Step 2) Now, go to the onInit method.

Step 3) Now, we can add the header in onInit method as given in below code snippet:
 protected onInit(): Promise<void> {  
   return super.onInit().then(_ => {  
    // other init code may be present  
    sp.setup({  
     spfxContext: this.context,  
     sp: {  
      headers: {  
        "X-ClientTag": "********"  
      }  
     }  
    });  
   });  
  }  

Here we have added 'X-ClientTag' header. You can also add comma separated multiple headers as shown in the below code snippet.
 sp.setup({  
     spfxContext: this.context,  
     sp: {  
      headers: {  
        "X-ClientTag": "********",  
        "Accept": "application/json;odata=verbose"  
      }  
     }  
    });  

Now your header is added successfully. You can verify the headers from Network tab of browser developer tool as shown in the below screenshot:

Conclusion:

This is how we can add Request Header in SPFx while using PnP to perform SharePoint list/library operations.

If you have any questions you can reach out our SharePoint Consulting team here.

June 16, 2022

How to apply Site Logo in SharePoint Site using Power Automate?

Introduction:

In this blog, we will learn how can we apply the site logo to SharePoint Site using Power Automate.

We can follow the steps explained below to apply site logo using Power Automate.

Steps:

Step 1: Add action for Send an HTTP request to SharePoint as shown in the below screenshot.

Step 2: Now, in this action, select the fields as given below:
Site Address: Select the site collection where you want to apply the site logo.
Method: POST
Uri: _api/web
Headers: 
              accept: application/json;odata=verbose
              content-type: application/json;odata=verbose
              X-HTTP-Method: MERGE
Body: 
{  
      '__metadata': { type: 'SP.Web' },  
      'SiteLogoUrl': 'https://*******.sharepoint.com/SiteAssets/logo.png'
   }

In SiteLogoUrl, we need to enter the URL of the logo image.

Here is the screenshot of all selected values in Send an HTTP request to SharePoint action.

Step 3: Now, when this flow triggers, the logo will be applied to the site.

Conclusion:

This is how we can apply logo in SharePoint site using Power Automate. Hope this blog will be helpful!

If you have any questions you can reach out our SharePoint Consulting team here.