Introduction:
In this blog, we will learn how can we apply the site logo to SharePoint Site using Power Automate.
We can follow the steps explained below to apply site logo using Power Automate.
Steps:
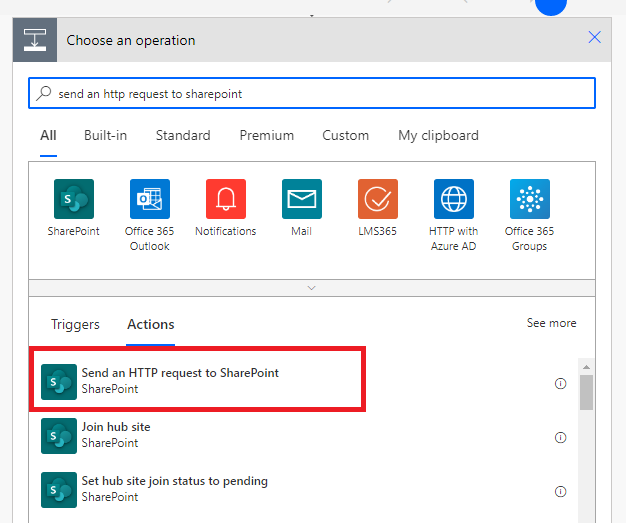
Step 1: Add action for Send an HTTP request to SharePoint as shown in the below screenshot.
Step 2: Now, in this action, select the fields as given below:
Site Address: Select the site collection where you want to apply the site logo.
Method: POST
Uri: _api/web
Headers:
accept: application/json;odata=verbose
content-type: application/json;odata=verbose
X-HTTP-Method: MERGE
Body:
{
'__metadata': { type: 'SP.Web' },
'SiteLogoUrl': 'https://*******.sharepoint.com/SiteAssets/logo.png'
}
In SiteLogoUrl, we need to enter the URL of the logo image.
Here is the screenshot of all selected values in Send an HTTP request to SharePoint action.

Step 3: Now, when this flow triggers, the logo will be applied to the site.
Conclusion:
This is how we can apply logo in SharePoint site using Power Automate. Hope this blog will be helpful!
If you have any questions you can reach out our SharePoint Consulting team here.


No comments:
Post a Comment