November 24, 2022

Azure | Copy Data from CSV to SQL Server using Azure Data Factory, Azure Logic Apps and SharePoint Document Library


Introduction:

We created a process to copy data from CSV file uploaded in SharePoint Document Library to SQL Server Database for a Drug Dispensary based out of Pennsylvania, USA.

For this, we created a Document Library in SharePoint Site where the user uploads the CSV file, so when a file is uploaded in the SharePoint Document Library, the Logic App captures the File that has been uploaded, and the content is passed from the Logic App to the Azure Data Factory for further processing. The Azure Data Factory has a copy data pipeline, which copies the Data of CSV to the relevant SQL Table.

Prerequisites:

·         Azure Subscription

·         Azure Storage Account

·         Azure SQL Database

·         SharePoint Site with Document Library


Implementation:

In order to execute the process, the following task needs to be carried out.

·         Create SharePoint Document Library.

·         Blob Storage Folders for individual Vendors.

·         SQL Database with Relevant tables and Stored Procedures.

·         Create Azure Data Factory (Datasets and Pipeline) for all three Vendors.

·         Logic App creation for the Vendors.


SharePoint Document Library

 The SharePoint Site Document Library is the initial trigger where the CSV file is uploaded and then the rest of the process is carried out. We created a Document Library, and the CSV file is uploaded into that particular folder.


Azure Blob Storage

·        Blob storage for all the vendors created, the storage is used to store the CSV while processing and then deleting after the process has been completed.

·        Each folder is dedicated to individual Vendors.

Create a Blob Storage

To create a container in the Azure portal, follow these steps:

1.       Go to your new storage account in the Azure portal.

2.       In the left menu for the storage account, scroll to the Blob service section, then select Containers.

3.       Select the + Container button.

4.       Type a name for your new container. The container name must be lowercase, must start with a letter or number, and can include only letters, numbers, and the dash (-) character.

5.       Set the level of public access to the container. The default level is Private (no anonymous access).

6.       Select OK to create the container.


SQL Server

Create a table to store the Data.


Create a user-defined data table type for the equivalent table, the UDT would be given reference in the Data factory for the processing


Create a Stored Procedure that inserts the data with the help of the UDT into the corresponding table.


 The above image shows SalesReportByPatient Parameter which would be passed in sink configuration in the Azure Data Factory.

Azure Data Factory

·         We need to create Data Factory for the Vendors.


·         Dataset which will be created would be for all the Tables in the Schema. Two datasets are created for each table.

o   CSV dataset

o   SQL dataset

1. Create a Dataset in a Data Factory


1.       Go to the Source tab. Select + New to create a source dataset. 


2.       In the New Dataset dialog box, select Azure Blob Storage and then select Continue. The source data is in Blob storage, so you select Azure Blob Storage for the source dataset.


3.       In the Select Format dialog box, choose the Delimited Text type of your data, and then select Continue.


4.       In the Set Properties dialog box, enter the source name. Select the checkbox for the first row as a header. And Select your source file. 


5.       New Page opens up. Select the Schema tab and click on the Import Schema it will import the schema.


Note: Follow the same steps to Create Destination (only changes are select SQL Server database in step 2)

2. Create a Copy Data Pipeline

In the Activities toolbox, expand the Move and Transform category, and drag and drop the Copy Data activity from the toolbox to the pipeline designer surface. 


Configure Source

Go to the Source tab. Select + New to create a source dataset.


Source dataset: select dataset which we created for the source

Wildcard paths: in this field, add the Blob Storage's dynamic path. The dynamic filename comes from the Logic Apps as a parameter

3. Configure sink

Sink Dataset: Select the destination dataset

Stored procedure: select the stored procedure name which you created in the SQL server

Table type: select the table type which you created in SQL Server

Table type parameter name: add parameter name which you declare in the stored procedure

4. Configure Mapping

Select the source column and destination column for mapping data. 

Azure Logic App

 To Create Logic Apps follow the below steps

1.        Sign in to the Azure portal with your Azure account credentials.

2.       In the Azure portal search for Logic Apps.


3.       On the Logic Apps page, select Add.


4.       On the Logic App pane, provide basic details and settings for your logic app. Create a   new resource group for the purposes of this example logic app.


5.       When you're ready, select Review + Create. Confirm the details that you provided, and select Create.


6.       After Azure successfully deploys your app, select Go to the resource. Or, you can find and select your logic app by typing the name in the search box. 


7.       The Logic Apps Designer opens and shows a page Under Templates, select Blank Logic App. 


Logic App that triggers when a file is uploaded and calls Azure Data Factory to copy data. To create add the below actions.

1.       We have added trigger “when a file is created in a folder” in logic apps for getting the file from SharePoint.


2.       To process file from SharePoint to Azure Data factory we need to save the file in Azure Blob storage so we did that in logic apps using a blob storage connector.


3.       To run the Data factory we have added “Azure Data Factory Connector”, We pass two parameters to the Data Pipeline File name and Filetype.


When the Logic Apps runs, it will get the file from the SharePoint Document Library and copy it in Blob Storage, followed by the Data factory pipeline.

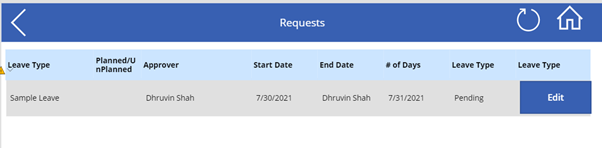
Output: The Data is inserted into the SQL database after the Logic App is successfully created. The Logic App keeps on checking the file in the SharePoint list and runs at particular given time intervals, for example, every 15 minutes.


Conclusion:

 Azure Data Factory is a robust way to transfer data and makes it easier to get multiple CSV files from SharePoint, create pipelines process of those files and move it to the relevant Database. 


If you have any questions you can reach out our SharePoint Consulting team here.

October 20, 2022

Create Dynamic Timeline Component in React JS/TS.


SCENARIO

While working on one of the requirements for an Automobile sector project for a client based out of Dallas, Texas, There was a requirement to display dynamic timeline component with Expand/Collapse feature using React JS/TS.


CHALLENGE


There is no OOTB module OR component which we can utilize in React to meet this requirement. The only option is to develop custom component using JS/TS. 

APPROACH

We are going to create a custom and complete dynamic timeline component with additional feature like expand and collapse in React JS/TS.

Please follow the below details steps to meet requirement.

Step 1: 

Create React JS or React TS application. We can use following commands respectively for React JS and React TS.

    npx create-react-app timeline --template typescript

    npx create-react-app timeline

Step 2:

Once you execute the above command in your terminal you will get the following structure of your React Project.

Step 3 :

After Creating the project we need to add some plugin which you can install by executing the following commands.

    npm i @fortawesome/react-fontawesome

    npm i @fortawesome/free-solid-svg-icons

Step 4:

Now, Clear the project structure and we have to add new two files named as : Timeline.tsx and App.tsx.


Step 5:

Add the following Code to the Timeline.tsx file

In the above code we have defined function interface and the state as follows:

Interface Props : In React JS we get the Props directly from the parent component but in React TS we have to pass interface and from interface we get the props functions and variables. 

here we have one object for the timeline details and one function for the callback to set the state of Parent component.

updateStatus Function : This function will take the updated status as the argument and the object of timeline. So, this function will take both as a argument and update the status of current state and call the callback function from Props to and pass updated Timeline information object.

In render method we have taken a const variable timelineData which takes values from Props and then we have a return function which returns the timeline View based on different condition. Also, We have one flag named as "isOpen" which basically show the view between expand or collapse.

Step 6 : 

Once we are done with the timeline component, we will move to main App.tsx component. 

Add the following code to the App.tsx file. We can directly move this code into Index.tsx , but we want to create a dynamic component so we are adding a new component names as App.tsx 

In this file we have defined one static state object named as "timelineDetails". It contains the information of the timeline which we want to show on the component view as well as set flag to show status and expand collapse position. 

We also have one function names as "updateRecord", It accepts data as an argument which is an object of the timelineDetails. this function is going to be called from the Timeline.tsx file means the child component. This function finds the matching object from the timelineDetails and store in "tempTimeline" and then will replace the states object with the updated one.

Step 7 : 

Now add the following css to the App.css file for the designing and the expand/collapse view.

Step 8 :

At last, now execute the code and you will get below output with look & feel.


Expand View:


Collapse View : 


Conclusion : 

This component will create the dynamic view along with look & feel as per requirement. We can use this Timeline.tsx in any component outside of this project but we have to take care about the function and its parameter. 

We can use this timeline component as independent component with the expand and collapse functionality with complete dynamic Content.

October 13, 2022

Add Customized Disclaimer message for developers before Publishing Power BI Report

Overview:

In this blog, we will talk about how we can customize a Publish message in Power BI Desktop. This tip will help us to provide a disclaimer to our end-users before they publish any reports to Power BI Service. So, now let’s get started!

  1. Open your Power BI Service account.
  2. Go to Admin Center.
  3. Go to Tenant Settings and expand “Show a custom message before publishing reports”
  4. Turn on the feature and add the following custom message. You can add any message based on your customization.
     #### Important Disclaimer  
     Before publishing the report to a workspace, make sure the user is a part of the workspace.  
    
  5. Click on Apply.
  6. Wait for 15-20 minutes to reflect the changes to Power BI Desktop.
  7. Sign out and Sign In again to your Power BI Desktop. Now, we will be able to see customized publish messages for our Power BI Desktop.

Conclusion:

This is how we can easily customize publish messages for our Power BI Desktop. Isn’t that amazing?

If you have any questions you can reach out our SharePoint Consulting team here.

October 6, 2022

Convert Power Apps Controls to PDF without HTML (Using PDF Function)

Introduction:

We have often come across requirements to convert a control or a screen from Power Apps to PDF. Earlier, we used to generate an HTML and populate the data from Power Apps which goes to Power Automate and create a PDF file.

With this new feature of PDF Function in Power Apps, this has become much simpler.

Please follow the below steps for getting the PDF function in PowerApps:


Step 1: Go to File -> Settings

Step 2: Go to Upcoming Feature and search for PDF and enable the PDF Function toggle.


Once we have enabled the function, you will be able to use this function in your App.

Please see the below example for generating PDF from Power Apps:

Step 1: Create a Power Automate Flow with trigger Power Apps (V2) and Add an input as File.

Step 2: Add action to Create file in OneDrive for Business and add the output of the trigger to File Content

Hence, the overall flow will look like this:


Step 3: Go to Power Apps and add this flow on an Action Button.

Step 4: Write the below code on “OnSelect” property of the button.

GeneratePDF.Run(
    {
        file: {
            name: "test.pdf",
            contentBytes: PDF(Screen1)
        }
    }
)

Step 5: Click on the button and it should trigger the Flow.

We should have PDF File generated in the OneDrive when Flow is executed successfully.

NOTE: If you are targeting to convert a gallery control to PDF, then the time it takes to convert varies upon the number of rows in the gallery.


Conclusion:

We can now generate PDF for a specific control as well as for the whole screen without generating any HTML code and CSS issues. Hope this helps!

If you have any questions you can reach out our SharePoint Consulting team here.

September 29, 2022

Get Members from the Security Group in Power Apps

We often come across a requirement wherein we need to fetch the information from the Security Group and need to display within Power Apps for Business Logic implementation.

Example:
Below is one of the Security Group created in Microsoft 365. Here, there are two members added to that Security Group.

In Power Apps, we need information about those two users.

Step 1: Open Power Apps Canvas App. First, we need to add Office 365 Groups Connector. For that, 
  1. Go to View Menu, and select Data sources.

  2. Search for “Office 365 Groups”. Select the highlighted one and add a connector to the App.

  3. Once the Connector is added, this will look like this.

Step 2:
  1. Open Power Apps screen and add a button.
  2. Write the following line of code for “On Select” event of the button.
     ClearCollect(MembersfromSG,Office365Groups.ListGroupMembers("GroupID").value)  
  3. Here, MembersfromSG is the Name of the collection. Office365Groups.ListGroupMembers(“Group ID”) returns the information about all the members of that security group.

How can we find that Group ID for the Security Group?
  1. Open Azure Portal and search for Groups. This will open the following screen.
  2. Select your security group for more information.
  3. Copy Object Id. This is the Group ID. We can use this Group ID in the below formula. The formula will look like this.
 ClearCollect(MembersfromSG,Office365Groups.ListGroupMembers("xxxxxxxx-1xxb-4x4b-xxxxxx").value)  

Step 3: Now, add Gallery Control and add Collection as a data source. This will show users in the Gallery.

Step 4: Now, let’s run the solution. This will show, User’s Display Name and User Principal Name.
You can check more properties of members returned by this collection from the executed collection.

Conclusion:
This is how we can get the Member Information using Office 365 Groups Connector in Power Apps.

If you have any questions you can reach out our SharePoint Consulting team here.

September 15, 2022

Filter Records based on Date and Time Condition in Power Apps

Overview:

Consider a scenario, where you are moving your Power Apps to the production environment and we only want to show records after our Production Launch!

Let’s say, Production Live happened at 01:00 PM then we need to show records created after 01:00 PM on that day. So, how can we achieve this? 

Solution:

We need to use the following Power Fx formula to achieve this!
  • DateValue
  • Time function with Hour, Minute, and Second

Consider the following example:
Below is the screenshot for List Items. We need to show records that are created only after “07/26/2021 01:00:00 PM”.
 

Go to your Power Apps and Add the following line of code to your Items Property of the Gallery.
 Filter(  
   Leaves,  
   (DateValue(  
     Text(  
       Created,  
       "[$-en-US]mm/dd/yyyy"  
     )  
   ) + Time(  
     Hour(Created),  
     Minute(Created),  
     Second(Created)  
   )) > (DateValue("07/26/2021") + Time(  
     Value(13),  
     0,  
     0  
   ))  
 )  

Here, we are comparing if the "Created" value from SharePoint List is greater than “07/26/2021 01:00:00 PM”.

As a result, we are getting the following outcome!
 

Conclusion:

Hope, this trick is helpful to you! Happy Power Apping!!

If you have any questions you can reach out our SharePoint Consulting team here.

September 8, 2022

How can we Pad 0 to Integer Values in Power BI?

Overview:

Sometimes we have a requirement, where we need to Pad “0” to our numeric value. There are multiple ways to implement this. But we will go with the simplest and easiest one! So, let’s get started!

Step 1:

This is our Sample Data Source, where we have Project ID, Project Name, and Hours column.

Now, we want to pad “0” before our Project ID column and need the end outcome like the following. So, how can we achieve this?

Step 2:

 - Open Model View of Power BI Desktop and select the “Project ID” column.
 - From Format, select “Custom”.
 - Under Custom Format provide, format as “00#” – This will suggest, from a 3-digit number, it will pad leading digits with “0”. 

Example: If the number is 9, it will show as “009”. If the number is 19 then it will show as “019”. This will show us the end outcome as below screen!

Conclusion:

This is how we can simply pad leading “0” before the number in Power BI. Isn’t that cool? Happy Reporting!

If you have any questions you can reach out our SharePoint Consulting team here.