Showing posts with label PowerApps. Show all posts

June 12, 2025

Embed PDFs in Power Apps Using the Experimental PDF Viewer

Introduction

Power Apps now offers an experimental PDF Viewer control that lets you display PDFs directly within your app interface. This is especially helpful in use cases like displaying reference documents, training guides, or reports stored in SharePoint Document Libraries - without requiring users to download them.

Below is a detailed, step-by-step guide to help you display a PDF stored in SharePoint within your Power Apps application using the experimental PDF Viewer control. 

Power Apps - PDF Viewer

Step-by-Step Instructions:

Step 1: Open or Create a Power Apps Project 

  • Navigate to https://make.powerapps.com.
  • Either:
  • Create a new Canvas app (start from blank), or
  • Open an existing app where you want to display the PDF.

Step 2: Connect to SharePoint Document Library 

  1. From the left panel, click on Data.
  2. Click on + Add data.
  3. Search for SharePoint and select it.
    Add data source in Power apps

  4. Choose your account, paste or search for your SharePoint Site URL, and then click Connect.
  5. Select your Document Library where your PDFs are stored, then click Connect.
  6. (Optional) Open your SharePoint Document Library in a new tab and upload your PDF if it's not already available. This ensures the document can be linked and previewed in Power Apps.

Step 3: Insert the Experimental PDF Viewer 

  1. In Power Apps, click on the Insert or + icon on the left toolbar.
  2. Use the search bar to search for PDF Viewer (experimental).
    Insert PDF viewer (experimental)

  3. Click to insert it into your screen.

Step 4: Set Up PDF Viewer to Display a File 

Start by using this formula in the Document property of the PDF Viewer: 

LookUp(Documents, Name = "Sample PDF.pdf").'Link to item'

Note: This may not always work as expected in Power Apps. If the PDF doesn't load, try the workaround method below to generate a direct file link. 

Workaround: Generate a Direct PDF URL Manually 

Sometimes Power Apps doesn't support rendering the default SharePoint link ('Link to item'). Instead, you can manually create a direct PDF link. 


Steps to generate a working PDF link: 

1. In SharePoint Document Library:

  1. Click on + Add Column > Select Hyperlink.
  2. Name it: Link

2. Once the column is created, go to Library Settings, then click on the Link column. 

  1. Change Format URL as: from Hyperlink to Picture.
    Library Setting - Hyperlink to Link

3. Back in your Document Library: 

  1. Click on the ellipsis (...) next to the PDF file.
  2. Click Open in browser. The PDF opens in a new tab.
  3. Copy the full URL. Remove everything after .pdf so that the link ends with .pdf.

4. Go back to your document library and:

  1. Click on Edit in grid view.
  2. Paste this cleaned-up PDF URL into the Link column for that file.
  3. Click Exit grid view to save changes. 

Edit in grid and update the url - remove extra from the link ends with .pdf
Step 5: Update Power Apps to Use the Cleaned URL 

Finally, update the Document property of the PDF Viewer to reference your new link column: 

LookUp(Documents, Name = "Sample PDF.pdf").Link

Success! Your PDF should now render properly inside the Power Apps screen. 

Show PDF in Power Apps using PDF viewer


Pro Tips:

  • Use Preview mode (F5) to test PDF rendering.
  • Ensure your PDF link ends with .pdf - any additional query parameters or tokens may break it.
  • This experimental control works best with direct-access or publicly accessible links.

Use Case Example:

This method is ideal for onboarding portals, document approval systems, training guides, or resource libraries where documents need to be viewed quickly without download. 


Conclusion:

Embedding PDFs within Power Apps is now easier thanks to the experimental PDF Viewer control. With a direct SharePoint link configured properly, you can enable seamless in-app PDF viewing for onboarding guides, reference documents, and more - without needing third-party tools or downloads. 

If you have any questions you can reach out our SharePoint Consulting team here.

September 15, 2022

Filter Records based on Date and Time Condition in Power Apps

Overview:

Consider a scenario, where you are moving your Power Apps to the production environment and we only want to show records after our Production Launch!

Let’s say, Production Live happened at 01:00 PM then we need to show records created after 01:00 PM on that day. So, how can we achieve this? 

Solution:

We need to use the following Power Fx formula to achieve this!
  • DateValue
  • Time function with Hour, Minute, and Second

Consider the following example:
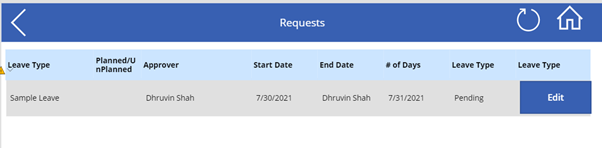
Below is the screenshot for List Items. We need to show records that are created only after “07/26/2021 01:00:00 PM”.
 

Go to your Power Apps and Add the following line of code to your Items Property of the Gallery.
 Filter(  
   Leaves,  
   (DateValue(  
     Text(  
       Created,  
       "[$-en-US]mm/dd/yyyy"  
     )  
   ) + Time(  
     Hour(Created),  
     Minute(Created),  
     Second(Created)  
   )) > (DateValue("07/26/2021") + Time(  
     Value(13),  
     0,  
     0  
   ))  
 )  

Here, we are comparing if the "Created" value from SharePoint List is greater than “07/26/2021 01:00:00 PM”.

As a result, we are getting the following outcome!
 

Conclusion:

Hope, this trick is helpful to you! Happy Power Apping!!

If you have any questions you can reach out our SharePoint Consulting team here.

July 14, 2022

Close and Logout Power Apps using Exit() Function in Power Apps

Overview:

Sometimes, there is a requirement, wherein we need to close our Power Apps and Logout the user from the App’s context. How can we achieve this requirement? 

Power Apps provide one Power Fx formula to achieve this which is the EXIT() function! So, now Let’s explore this feature in detail!!

We have created one Power Apps with two buttons. First, let’s check the syntax!

Syntax: Exit([Signout]) 
  • Here Signout is an optional parameter that accepts a Boolean value. 
  • If we pass true, then, it exits from the app and signs out the user!

Let’s get started!

Step 1:

Add button and add the following code without optional parameter.

Step 2:

Add button and pass signout parameter as true. 

This will log out to the end-user and prompt them to Sign In again!

Conclusion:

Hope, this small Power Apps trick helps you!!

If you have any questions you can reach out our SharePoint Consulting team here.

October 21, 2021

Programming by Examples in Power Apps

Overview:

During this article, we will talk about new rolled out functionality by Microsoft this year in Power Apps Ideas. We will talk about “Programming by Examples” feature in detail. So, Let’s get started!

What do we mean by Programming by Examples?

“Programming by Examples” is a new AI Driven capability in Power Apps Ideas that automatically generate Power Fx Formula for us. This new feature is powered by PROSE (Programming by Examples and Natural Language), researched and developed by the Microsoft PROSE team. 
The same technology is already used in other Microsoft products as well, e.g., Flash fill in Excel, Intellicode suggestions in Visual Studio, and Table extraction in Power Query, etc.

Note:  At this moment, it is only available for US Region. 

Enable Preview Feature:

Go to File menu, Open Settings, click on Upcoming Features and make sure Ideas Panel is turn on!
Once we turn on the above feature, the Ideas Panel will be available for you!

  1. Please take a look at the following Gallery control which is showing account information.
  2. Now, we want to show the date as “June 3 2021”. Then how can we do that?
  3. The above example output generated the Power Fx formula automatically. Select the formula and check the result. It will show you the following result!
So, this is how we can apply “Programming By Examples” in Power Apps. 

Let’s check some more examples:

Apply PBE on Text Columns:

  • We want only First name from Full name. Then just provide your expected output and the formula will be generated automatically. 
  • Below is the end outcome!

Apply PBE on Date column by Training the example:

  • We want to display the Month name in 3 characters. So, how can we do that?
  • Select Label, click on “Train from Examples’
  • Provide sample outcome for few fields and click on “Get Ideas”.
  • This will generate Power Fx formula
  • Apply the formula and check the result.

Conclusion:

This is how Power Apps Ideas feature works in Power Apps. Isn’t that cool? Happy Power Apping!!

If you have any questions you can reach out our SharePoint Consulting team here.

September 16, 2021

Power Apps Validation Tip - End Date and time should be greater than Start Date and time

Overview:

We implemented several Power Apps forms for a consulting firm based out of Alpharetta, Georgia, United States. We came across a scenario to validate Start Date & End Date in one of the forms. In this article, we will talk about how we can apply DateTime validation in our Power Apps Form. Most of the time, we need to implement, one most common validation in Power Apps where End DateTime must be greater than Start DateTime. How can we apply that validation? Let’s see!

We have the following form in our Power Apps. We want to validate, check-out time should be greater than check-in time! So, how can we achieve this?


Step 1:

Please check the Datacard for Check-In and Check-Out time.

Step 2:

Add the following line of code on below highlighted controls! Need to add the same code on all following controls!

 If(  
   Or(  
     IsBlank(  
       DateValue2.SelectedDate + Time(  
         Value(HourValue2.Selected.Value),  
         Value(MinuteValue2.Selected.Value),  
         0  
       )  
     ),  
     IsBlank(  
       DateValue1.SelectedDate + Time(  
         Value(HourValue1.Selected.Value),  
         Value(MinuteValue1.Selected.Value),  
         0  
       )  
     )  
   ),  
   Set(  
     IsEndDateValid,  
     true  
   ),  
   DateDiff(  
     DateValue1.SelectedDate + Time(  
       Value(HourValue1.Selected.Value),  
       Value(MinuteValue1.Selected.Value),  
       0  
     ),  
     DateValue2.SelectedDate + Time(  
       Value(HourValue2.Selected.Value),  
       Value(MinuteValue2.Selected.Value),  
       0  
     ),  
     Minutes  
   ) > 0,  
   Set(  
     IsEndDateValid,  
     true  
   ),  
   Set(  
     IsEndDateValid,  
     false  
   )  
 )  

Step 3:

Set Validation message
 If(!IsEndDateValid, "Ënd Date Time should be greater than Start Date Time")  

Step 4:

Set Visible property for an Error message.

Step 5:

Prevent form for submitting an invalid entry by setting up the below condition for “OnSave”. If you are using a standalone Canvas app, then you need to write the same code on your button click!

Step 6:

Change "OnNew" Property of form. If you are using a standalone Canvas app, then you need to write the same code on the New button of the form!
 NewForm(SharePointForm1);Set(IsEndDateValid,true)  

Step 7:

Save and Publish form!

Conclusion:

This is how we can simply apply end DateTime validation for Power Apps! Happy Power Apping!

If you have any questions you can reach out our SharePoint Consulting team here.

February 18, 2021

How to covert out of the box (OOTB) Power Apps Dropdown to Checkboxes?

Overview:

We implemented several Power Apps forms (customized SharePoint Forms) for a consulting firm based out of Alpharetta, Georgia, United States. When we customize our SharePoint form having a choice column, Power Apps represent the choices as a dropdown. For one of the forms we implemented, the requirement was to display checkboxes instead of a dropdown list for a choice column. So, how can we achieve this requirement? Let’s get started!

  1. Open your customized SharePoint Power Apps form.
  2. We need to add Checkboxes in the same data card as the dropdown. To add a checkbox, go to the insert menu and add a checkbox. Add checkboxes based on the # of choice value from the dropdown.


  3. Now, we need to create one group for all checkboxes. In this group add default property using the below code.
     Self.Text in DataCardValue2.SelectedItems.Value  


  4.  For each Checkbox, we need to execute the below piece of code on both "OnCheck" and "OnUncheck" events. Add the following code to the "OnCheck" and "OnUncheck" events. The code is same for both the events for all the checkboxes.
     ClearCollect(ddtocb,  
     If(Checkbox1.Value,Checkbox1.Text),  
     If(Checkbox1_1.Value,Checkbox1_1.Text),  
     If(Checkbox1_2.Value,Checkbox1_2.Text),  
     If(Checkbox1_3.Value,Checkbox1_3.Text),  
     If(Checkbox1_4.Value,Checkbox1_4.Text),  
     If(Checkbox1_5.Value,Checkbox1_5.Text),  
     If(Checkbox1_6.Value,Checkbox1_6.Text),  
     If(Checkbox1_7.Value,Checkbox1_7.Text),  
     If(Checkbox1_8.Value,Checkbox1_8.Text),  
     If(Checkbox1_9.Value,Checkbox1_9.Text),  
     If(Checkbox1_10.Value,Checkbox1_10.Text),  
     If(Checkbox1_11.Value,Checkbox1_11.Text)  
     );  
     ClearCollect(ddtocb,Filter(ddtocb,!IsBlank(Value)))  


  5. Now, select dropdown and open the DefaultSelectedItems property. Pass collection created in the above step using the following code snippet.
     If( IsEmpty(ddtocb),Parent.Default,ddtocb)  


  6.  Select final Data Card and change Update property using the following code snippet.
     If( IsEmpty(ddtocb),ThisItem.'<Field Name>',DataCardValue2.SelectedItems)  


  7. At last, change the dropdown’s visible property to make it false.

Conclusion:

This is how we can convert our dropdowns to checkboxes.

If you have any questions you can reach out to our SharePoint Consulting team here.

February 11, 2021

Exploring Microsoft Teams connector in Power Apps – Get Channel Messages

Introduction:

We recently implemented Power Apps - Canvas App that was having the integration with Microsoft Teams for Construction & Engineering company based out of Washington, United States. One of the requirements was to get the MS Teams - Channel Messages and display the same in Power Apps.

In this article, we will explore the Microsoft Teams connector available in Power Apps. The Teams connector with Power Apps opened lots of possibilities to leverage Teams capability within the Power Apps. Let's check how to get messages of a specific channel in MS Teams in PowerApps and what other actions are available using the Teams connector.

Business Scenario:

Here, first we will show all available Teams for the current logged in user. When user clicks on Teams name, this will open all channels for the current Team. Once we click on the channel name, we will be able to see all the messages from that channel on the right side section. That’s the end goal we will achieve at the end of the blog. So, now let’s get started!


Step 1: Add "MicrosoftTeams" connector in Power Apps from DataSource.

Step 2: Insert a Blank Gallery and add the below code in the Items of the Gallery.

 MicrosoftTeams.GetAllTeams().value  

Step 3: Add a label in the Gallery and show the DisplayName of the Items.

 ThisItem.displayName  

 Hence, you can see it will list all the teams that you are part of.


Step 4: Now we require all the channels of the selected Team. For that, insert another gallery and add this code into the Items of that Gallery.

MicrosoftTeams.GetChannelsForGroup(Gallery1.Selected.id).value 

Step 5: Now as we have both the Items (i.e. Team and Channel), we can get the messages of that specific selected channel. Insert a new Gallery and add this code in the Items property of that Gallery.

 SortByColumns(MicrosoftTeams.GetMessagesFromChannel(TeamsGallery.Selected.id,  
 ChannelGallery.Selected.id).value,"createdDateTime",Ascending)  

Step 6: Add a HtmlText in this Gallery and place the below code in the HtmlText

 ThisItem.body.content  

As the message which is returned is in the form of HTML, we need to use the HtmlText element for displaying messages. The final output may look something like shown in the below image:


Here are some of the properties which we can show along with the channel messages:

         From

         User

         ThisItem.from.user.displayName

         ThisItem.from.user.id

         Device

         ThisItem.from.device

         Attachments

         ThisItem.attachments

         Mentions

         ThisItem.mentions

         Reactions

         ThisItem.reactions

         Dates

         ThisItem.createdDateTime

         ThisItem.lastModifiedDateTime

         Importance

         ThisItem.importance

As a final outcome, we are able to generate the screen like below.

References:

Please check the following link to get more information about different available methods for Microsoft Teams connector for Power Apps.

https://docs.microsoft.com/en-us/connectors/teams/#actions

Conclusion:

This is how we can use the Microsoft Teams connector for fetching Channel messages in Power Apps. Happy Power Apping!

If you have any questions you can reach out our SharePoint Consulting team here.

January 12, 2021

Allow users to upload only specific extension files in Power Apps Attachment control

Introduction:

In this blog, we will learn how to allow users to upload only specific extension files in Power Apps Form Attachment control. The example here we have carried in this blog is to allow users to upload only the ".pdf" extension files.

Resolution:

Below are the steps we are going to work on here!

1.     Set restriction on uploading other extension files in Attachment control and notify the user when they upload any extension file other than ".pdf".

2.     Restrict the user from saving until resolving file errors.

Step 1: Set restriction on uploading other extension files in Attachment control

Place the below code at OnAddFile property of the Attachment control:

 If(  
   CountRows(  
     Filter(  
       RenameColumns(  
         DataCardValue4.Attachments,  
         "Name",  
         "NewName"  
       ),  
       Last(  
         Split(  
           NewName,  
           "."  
         )  
       ).Result <> "pdf"  
     )  
   ) > 0,  
   Notify(  
     "Only PDF files can be attached",  
     NotificationType.Error  
   );  
   ,  
   SubmitForm(Form1);  
   ResetForm(Form1);  
   EditForm(Form1);  
   )  

After placing this, check by adding a different extension file in the attachment control. You will be able to see this type of error at the top of the app.


Now as we have set the restriction message, let’s restrict the user from saving the form until all the attachments in the control are ".pdf".

Step2: Restrict user from saving until resolving file errors

Place the below code in the OnSelect property of the save button or in the OnSave property of SharePointIntegration:

  If(  
   CountRows(  
     Filter(  
       RenameColumns(  
         DataCardValue4.Attachments,  
         "Name",  
         "NewName"  
       ),  
       Last(  
         Split(  
           NewName,  
           "."  
         )  
       ).Result <> "pdf"  
     )  
   ) > 0,  
   Notify(  
     "Only PDF files can be attached",  
     NotificationType.Error  
   );  
   ,  
   SubmitForm(Form1);  
   ResetForm(Form1);  
   EditForm(Form1);  
   )  

Now add a different file extension in the control and click on save. It will show the below error and won’t let the user save the item.

Conclusion

This is how we can restrict users to upload only ".pdf" extension files in the Power Apps - Form Attachment Control.

If you have any questions you can reach out our SharePoint Consulting team here.

December 18, 2020

Binary Republik Proud to be Named a Global Leader on 2020 Clutch 1000!


Here at Binary Republik, we know it’s been a difficult year all around. Despite the conditions, we’re proud to report we’ve maintained our standards of quality and service as a leading Microsoft Technology Consulting company. We made sure that our clients had access to cutting edge technology and were able to get acclimated to a new normal.

As a wonderful way to wrap up the year, we’ve been featured in the Clutch 1000, an exclusive list of the top 1% of vendors on their platform. Clutch is a B2B market research authority that uses a one-of-a-kind ranking formula to identify key players in the services space.

We are thrilled to have been chosen as one of the top Microsoft Technology Consulting company and it proclaims our dedication and quality of the work we deliver to Microsoft ISVs, MSPs, MVPs, and more - Jaldeep Patel, Global Director, Binary Republik

We couldn’t have earned this award without the help of our wonderful clients. Take a look at some of
the kind words they had to share about our work when interviewed by the Clutch team:

“The most impressive aspect of Binary Republik was the size of both their team and their knowledgebase. Many firms only specialized in custom development or system architecture. Other firms didn't have an expert for every subject, but with Binary Republik we knew that someone on their team would be able to help us find an answer. Because of their size, they are also able to get back to us quickly while still maintaining genuine communication and professional relationship.”
                                                            – Web Applications Developer, Community College

“Binary has a great team that is focused on helping customers to solve their problems. They come to the table with an open mind and give realistic honest solutions and suggestions. They estimate and on-time delivery is unmatched”
                                                             – VP of Product &amp; Engineering, Inkriti

“Like many companies, we've had varying degrees of success with offshore & outsourcing, especially outside Europe. However, Binary Republik displayed none of the negative aspects typically experienced with offshore vendors whilst remaining significantly more competitive than onshore vendor partners.”
                                                             – Product Manager, Education Services Company

We’re honored to be recognized by Clutch and our clients, and look forward to even more success in
2021! If you’re new to Binary Republik, contact us today to learn more about our award-winning
strategy and how it can help fuel your success in the new year!

November 20, 2020

Show values based on Lookup List Conditions for Lookup Column in Power Apps

Overview:

In this article, we will learn how we can show only specific values as Lookup value based on some conditions in Power Apps.

Real-Life Business Use Case:

We have come across a scenario where we have two SharePoint lists.

Domains List:


Request List:


 - Domain is a Lookup column from Domains List in the Request List.

 - We are implementing a Power Apps Form for Requests List.

 - We only want to show those Domains which are active, so how can we achieve this?

Let’s get started!


Step 1: Open Power Apps Form. By default, all values appear in the Lookup Dropdown.

Below is the code for the Default event which is available for the lookup dropdown.


Step 2: Now, we need to change the code with the following code.

 Filter(  
   RenameColumns(  
     AddColumns(  
       RenameColumns(  
         Choices([@Requests].Domain),  
         "Id",  
         "MID"  
       ),  
       "Status",  
       LookUp(  
         Choices([@Requests].'Domain:Status'),  
         Id = MID  
       ).Value  
     ),  
     "MID",  
     "Id"  
   ),  
   Status = "Active"  
 )  


Understanding the code:

 - By default, Lookup has two columns, ID and Value. With the above formula, we added one additional column –“Status” by using AddColumns() function.

 - To achieve this, we need to use the "RenameColumns" function to make the exact final structure that the lookup value expects.


- Now, let’s test the result. We can see only Active records in the dropdown.


- Now, let’s fill the form and save the value. 


 - The values are stored successfully in the SharePoint list.


Conclusion:

This is how we can apply a lookup list condition to show only active requests in the Lookup column. Hope this is clear now! Stay connected for amazing Power Apps Articles! Happy Power Apping!

If you have any questions you can reach out to our SharePoint Consulting team here.